Table of contents

Knowledge and know-how
Once you have set up a steady supply of healthy compost, it is time to make preparation to grow your own food. To start growing, some immediate questions need to be addressed:
- Where should I grow food?
- What is good soil?
- How to prepare my garden beds?
- What should I grow?
- How can I maintain my garden?
- When and what to harvest?
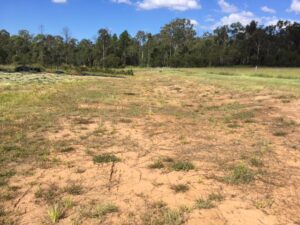
The questions of location and soil quality may be related. This project took place in an area with very poor soil conditions and the solutions presented on this website are aimed at growing your own food in difficult growing areas, such as areas with poor soil, urban areas without soil, or areas with limited space. Let’s start with some basic knowledge.
What is soil?
Soil consists of minerals (clay, silt and sand), liquids, gases, organic matter, microbes, bacteria, fungi, and animals that form a living ecosystem. The combination of these elements determines the soil’s properties (e.g. texture) and how useful a soil is for food production.
What is good soil?
A good soil for growing food has favourable properties, such as texture that allow plants to access all the things that they need; water, oxygen and nutrients.
Physical properties: texture
The physical composition of the soil, like the texture for example, will influence plant growth. Texture refers to the proportion of silt, clay and sand. A very clayey soil will make it difficult to drain water and has few air pockets, both factors that will harm the uptake of water and oxygen through the roots of the plants. On the other hand, sandy soils have low capacity to hold water and erode easily. Silt is a material composed of grains smaller than sand and larger than clay – it sits in between the two extremes. It has a powdery feel when dry and lacks plasticity when wet. A good balance of these components within the soil is an important condition for growing food. For simple testing of soil texture refer to the soil testing activity below.
Chemical properties: pH
The chemical properties of soils are also essential factors for growing food. One of the main characteristics is the measure of acidity or basicity of a soil (pH-value). The pH-value has a strong impact on the availability of nutrients in soil solutions. The pH of a soil may range from 0 (very acid) to 14 (very basic/alkaline). Some plants prefer more acidic soils, while other plants adapt better to more basic or alkaline soils. It is therefore essential to understand the requirements of plants in order to adjust the pH-value of the soil before cultivation. A healthy pH-value for soil, and also for compost, is about 6.5, slightly in the neutral to acidic range. For testing soil pH-value, please refer to the soil testing activity below.
Organic matter
Organic matter are the particles of decomposed living beings, such as plants and animals. It is an important element of soil, as it influences its physical and chemical properties, such as texture, soil structure and even the pH value. Organic matter decomposing in the soil can, given the right conditions, turn into humus – a process carried out by various microorganisms in the soil, including bacteria, fungi, vertebrates and invertebrates. The healthy decomposition process dissolves the minerals contained in the organic matter and makes them available to plants. The presence of organic matter and microbial biodiversity are critical characteristics of healthy soils. Healthy, humus-rich soils are dark in colour and on initial inspection you will find earthworms and other small creatures living in it.
How to prepare garden beds for growing?
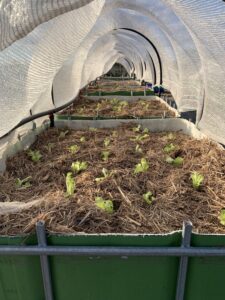
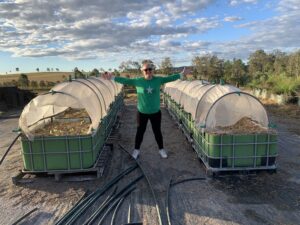
Wicking beds
One particularly easy and versatile approach to gardening is to build wicking beds – garden beds that are self-contained with a water reservoir they derive moisture from as needed. Wicking beds have some great advantages:
- They can be placed in difficult growing environments, on concrete, in car parks, even places without soil: it only needs a small reasonably flat space to place the beds, which are approximately 1m x 1m in size.
- Wicking beds can be arranged in arrays to maximise space utilisation, placed for decorative purposes or even be moved around in the case of a “Subee”, a mobile wicking bed created by Substation33.
- Wicking beds draw from their built-in water reservoir (hence the name “wicking”) and need a minimum of attention and maintenance (in the Yarrabilba project we often found beautiful growth after a period of long absence or even neglect).
- Wicking beds are easy to build and require only small investment.


For detailed instructions on how to build a wicking bed, please refer to the activity section below or to tutorials on the Internet such as this one from the (Australian) ABC.
We also conducted activities with students to build wicking beds. Please refer to the activity section below. The activity was very popular as it is hands-on, involves various different tasks for students to take on, and there is a concrete achievement at the end of the session.
What should I grow?
The short answer is: grow what you’d like to cook and eat! The longer answer is that what you grow also depends heavily on external factors such as where you live, climate, weather, seasonality and, of course, soil quality.
A great resource to choose your produce is the vegetable and flower planting guide made available as a sowing chart on the Australian website The Seed Collection.
The Seed Collection sowing chart offers a simple colour-coded guide to determine your climate zone and seasonality, and more detailed instructions on sowing of different vegetables and flowers. Instructions include the best time to sow, sowing depth, row spacing, direct sowing or seedling, time to germination and maturity.


The Seed Collection also offers advice on selecting seeds, for instance organic versus conventional and other tips and tricks on how to successfully start your own food garden.
Activities
Soil knowledge, coring samples and testing
Objective: Understand soil quality, its composition, structure and suitability to grow food.
Soil can be tested in a variety of different ways, some simple methods may be useful for school classes or groups of interested people.
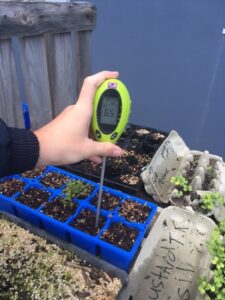
Soil can be tested using a simple pH testing device which are widely available in hard-ware stores or online. Students can for small groups and test various different locations for pH and record the values. Discuss why pH-values may be different in public areas, the compost heap, inside the wicking bed or in seedling trays.
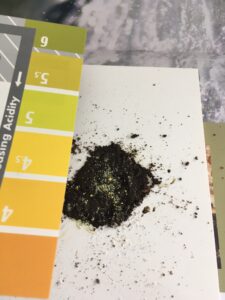
Another different test method uses a soil sample, which is mixed into a paste. A reactive powder indicates the pH-value of the sample. This method is considered more accurate than the testing device using a probe. It also allows to test and compare samples from different layers of the soil, for example deeper samples near the roots versus samples close to surface.
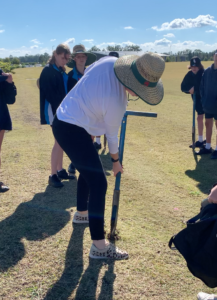
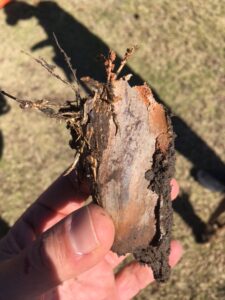
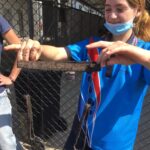
Soil composition tests can be easily performed using a manual auger to drill small soil cores. Groups of students drill cores from different locations and transport them back to the work area in the garden. By looking at the core itself the samples reveal different characteristics about colour, uniformity, structure, density and moisture. One test method involves adding a bit of waster to the soil core and test its plasticity by trying to mould a “sausage”. Another way to test soil composition is to place a soil sample in an empty glass jar, add water and shake it vigorously until dissolved in water. After a while the soil parts will settle and reveal layers of fine and coarse soil particles.
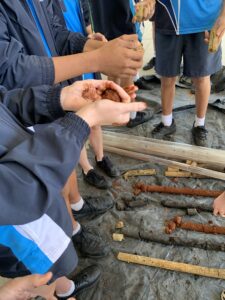
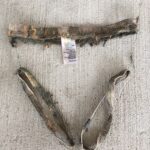
Cotton underwear test for soil microbial activity
Objective: Understand microbial activity in soils. Healthy soils have higher microbial activity and will decompose cotton underwear faster and more completely.
Choose different locations around the school grounds and gardens to bury 100% cotton underwear. Be sure to mark the spot so you will find the location easily when its time to exhume the underwear. Discuss with groups and let them choose location of different expected quality, which may include public areas, garden beds, wicking beds or compost piles. Every group should explain the reason and expectation for choosing a certain spot.
The underwear samples need to 100% cotton as synthetic fabrics contain plastic and will not be broken down by microbial activity. Keep the underwear sample in the ground for around 6-8 weeks before exhuming them. If underwear stays in the ground for too long, the differences may not be visible as all underwear may be completely decomposed at that time and it will be impossible to tell the difference between good and poor soil. Healthy soils will cause cotton to break faster.

The underwear test has been performed in larger scale experiments. This page gives information on an experiment by Dr Oliver Knox from the University of New England.

Grow in different soils
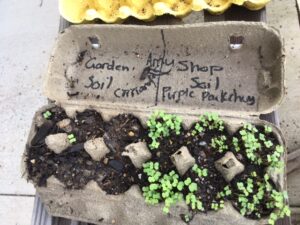
Objective: Understand soil quality by observing growth of fresh vegetables.
Different soil types and qualities, given the same location, care and maintenance will nevertheless produce vegetables of different quality. Use different soil types in seedling trays or empty egg trays and plant seeds in them. As shown in the images from our activities in YSSC the results might be dramatically different. Discuss why.
Build your own wicking bed
Objective: Learn how to build a wicking bed and understand how it works.
Building a wicking bed is an exciting and very rewarding project but it requires thorough preparation. We have provided a link to a video above with step-by-step instructions on how to build a wicking bed.
For our school activities we had the parts and materials delivered to the school beforehand, including:
- ICB containers, already cut open and ready to use
- Plastic pipes (to be cut)
- Geo fabric (to be cut)
- Filling material (gravel or plastic crates to sit in the bottom of the container)
- Metal elbow pipe and valve (as a valve)
- Soil and compost for filling the container
- Mulch
To build a wicking bed with students or a group of people you can follow the steps below:
- Recycled intermediate bulk container (IBC) cut in half; available online for between $50 and $200 depending on quality.
- Place short piece of plastic pipe connected to agricultural pipe inside the IBC.
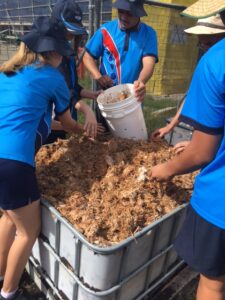
- Fill lower half of IBC with scoria, gravel or empty crates as a water reservoir.
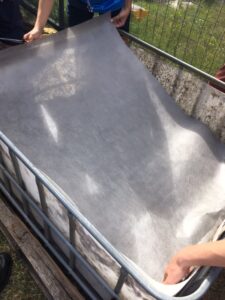
- Place a layer of geofabric on top of the scoria to separate it from the soil.
- Insert the pipe elbow and irrigation valve at the side of the IBC close to the bottom so it can be used to drain the wicking bed.
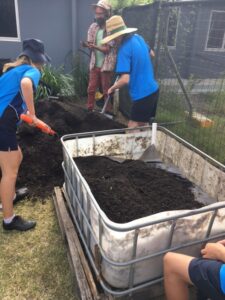
- Add gardening soil, compost and mulch.
- Plant seedlings into the garden bed.
Share different tasks and build the wicking bed together, the duration for the exercise should be about 40-60 minutes.


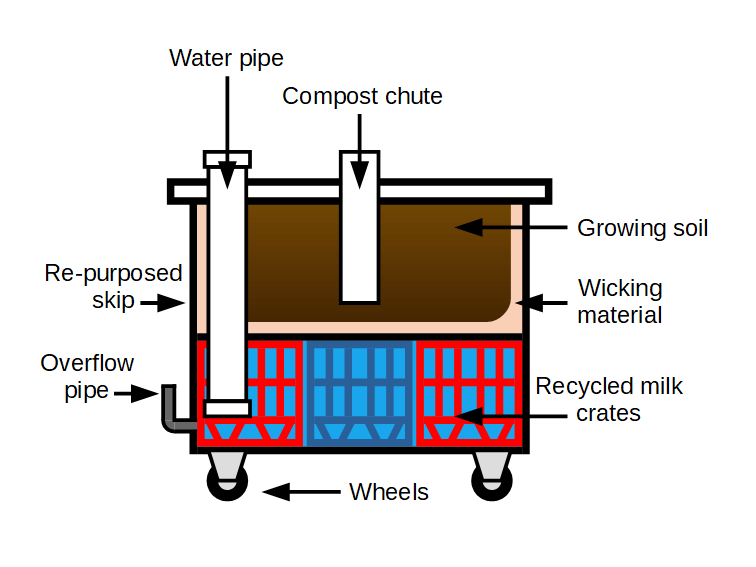
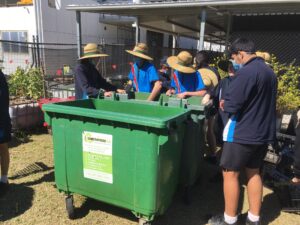
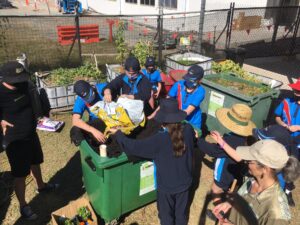
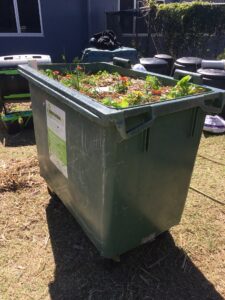
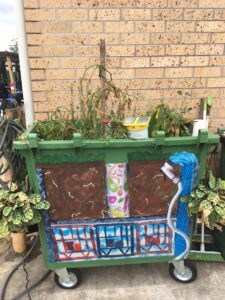
A bit more expensive but very special and a lot of fun is the “Subee”, your “wicking bed on wheels”, created by and named after Substation33. The principle of a Subee is more or less the same wicking beds. There is a layer of soil sitting on top of a water reservoir that it can draw moisture from as needed. The Subee is built from skips on wheels, which are normally discarded as waste after their lids break. Using the lid-less skip as a garden bed does not only help us grow sustainable fresh food, it also reduces the waste of discarded skips. Just like wicking beds, the Subee also has a water pipe to refill the reservoir and a drainage pipe to prevent overflow. The drainage pipe is essential as the Subee is designed to be mobile, which is often easier with the water drained before moving.
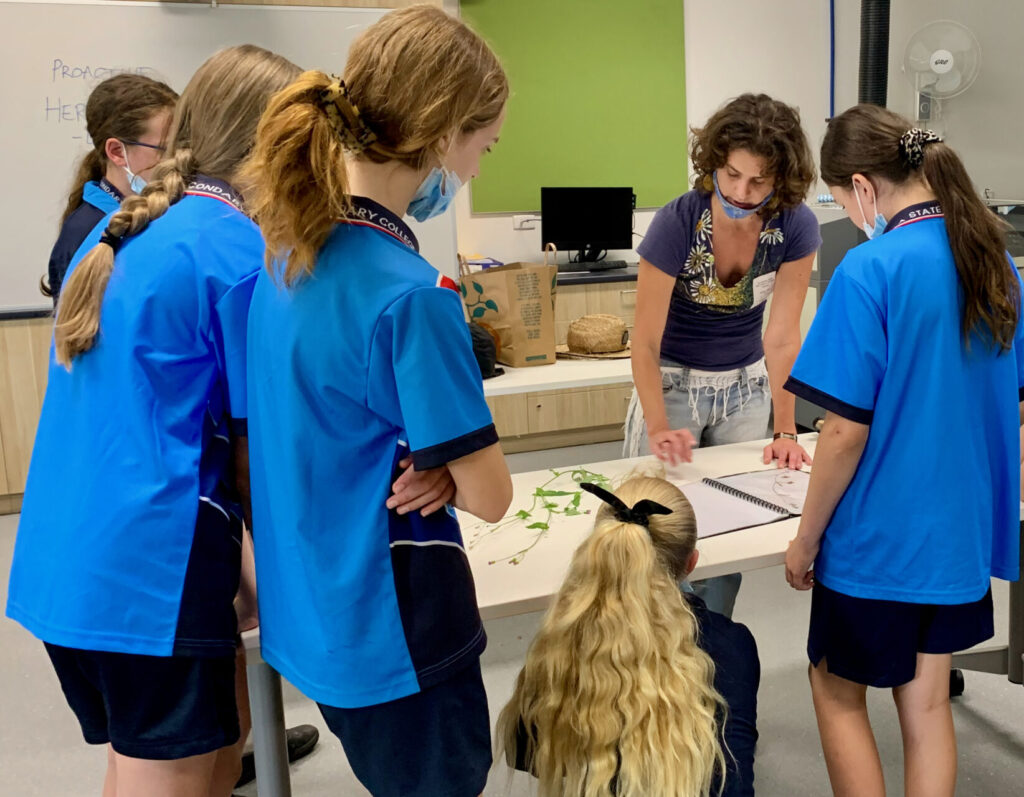
Herbarium exercise
Objective: Learn about plants and weed identification and harvest timing.
An important factor in growing food is knowing to identify the plants we are growing, and which ones will appear without planting them. For this it is important to know how to identify the plant species. A good way to introduce plant identification skills is through the creation of an herbarium. An Herbarium is a collection of preserved plants (and fungus). It is like a library with numerous catalogues with various plant specimens representing each species.
Nowadays, there are over 3,000 herbaria around the world, mostly associated with universities, botanic gardens, museums, and research institutions. One of the largest plant collections in Australia is the Australian National Herbarium. In the state of QLD, the Queensland Herbarium located at the Brisbane Botanic Garden in Mount Coot-tha, has a collection of over 850,000 plant specimen. These national and state herbaria are excellent sources of information that aid in understanding Australian ecosystem. As well as a useful tool on helping to identify plants for the general public.
The main purpose of the activity is to collect plants around the garden and also to create a record and teaching aid for a specific location. To create an herbarium, the following steps may be helpful:
1. Collecting the plant
Before pulling the plant out of the ground, it is important to take notes of some information on soil, surrounding environment, smell, texture, colour of the plants.
Take notes of these observations as they are crucial to the identification of the plant.
It is important to record the following details on the day of collection:
- Collector name
- Date
- Location
- Plant name (if known)
After observing these aspects, collect the plant in such a way that the structure is maintained. When possible, collect reproductive parts and roots. Place the specimen in a plastic bag along with the information noted above.
2. Pressing the plant
The plant must be dried to preserve it for storage in an herbarium catalogue. This will require a plant press and some newspapers. Open a sheet of newspaper and arrange the plant collected in the newspaper so that all the plant structure is visible. Arrange some leaves upside down. If necessary, remove some leaves to make it neater. After that, close the newspaper sheet and place it on the plant press, tightening the tapes or the press screw depending on the model. The plants must stay in the press until they are completely dry. The time for this to occur will depend on the amount of moisture in the plant. In some cases, it is necessary to change the sheets of newspaper.
3. Identifying the plant
In this process you can use virtual herbariums, botanical keys for identification, botanical professionals or contact the herbarium closest to your location.
4. Herbarium catalogue
Once all of the above steps have been followed the specimen can be placed in plastic sheet folders. First, make a mixture of glue with a little bit of water and carefully rub the plant with a piece of cotton and place it on a sheet of A4 paper. This paper should contain the information you collected in step number 1. The herbarium folders or catalogues can be stored in plastic containers in a dry place. Place a mothball tablet in the containers to prevent predation of the plants by insects.
As an extra activity students can draw leaves and flowers of the plant collected, which is a good way to remember plants and their characteristics.