Photogrammetry with Focus-Stacking? It can be done!
Coz of physics – the smaller an object gets, the shallower depth-of-field becomes… to the point where it becomes problematic in photography! One way to get around this is use focus-stacking – similar in principle to multiple aperture images being used to create high dynamic range photography, only instead of ‘stacking’ exposure, we layer focus and use post-processing techniques to composite our image-set into one tack-sharp image. Sounds simple but it can be painstaking work even with software and hardware tools to help you out.
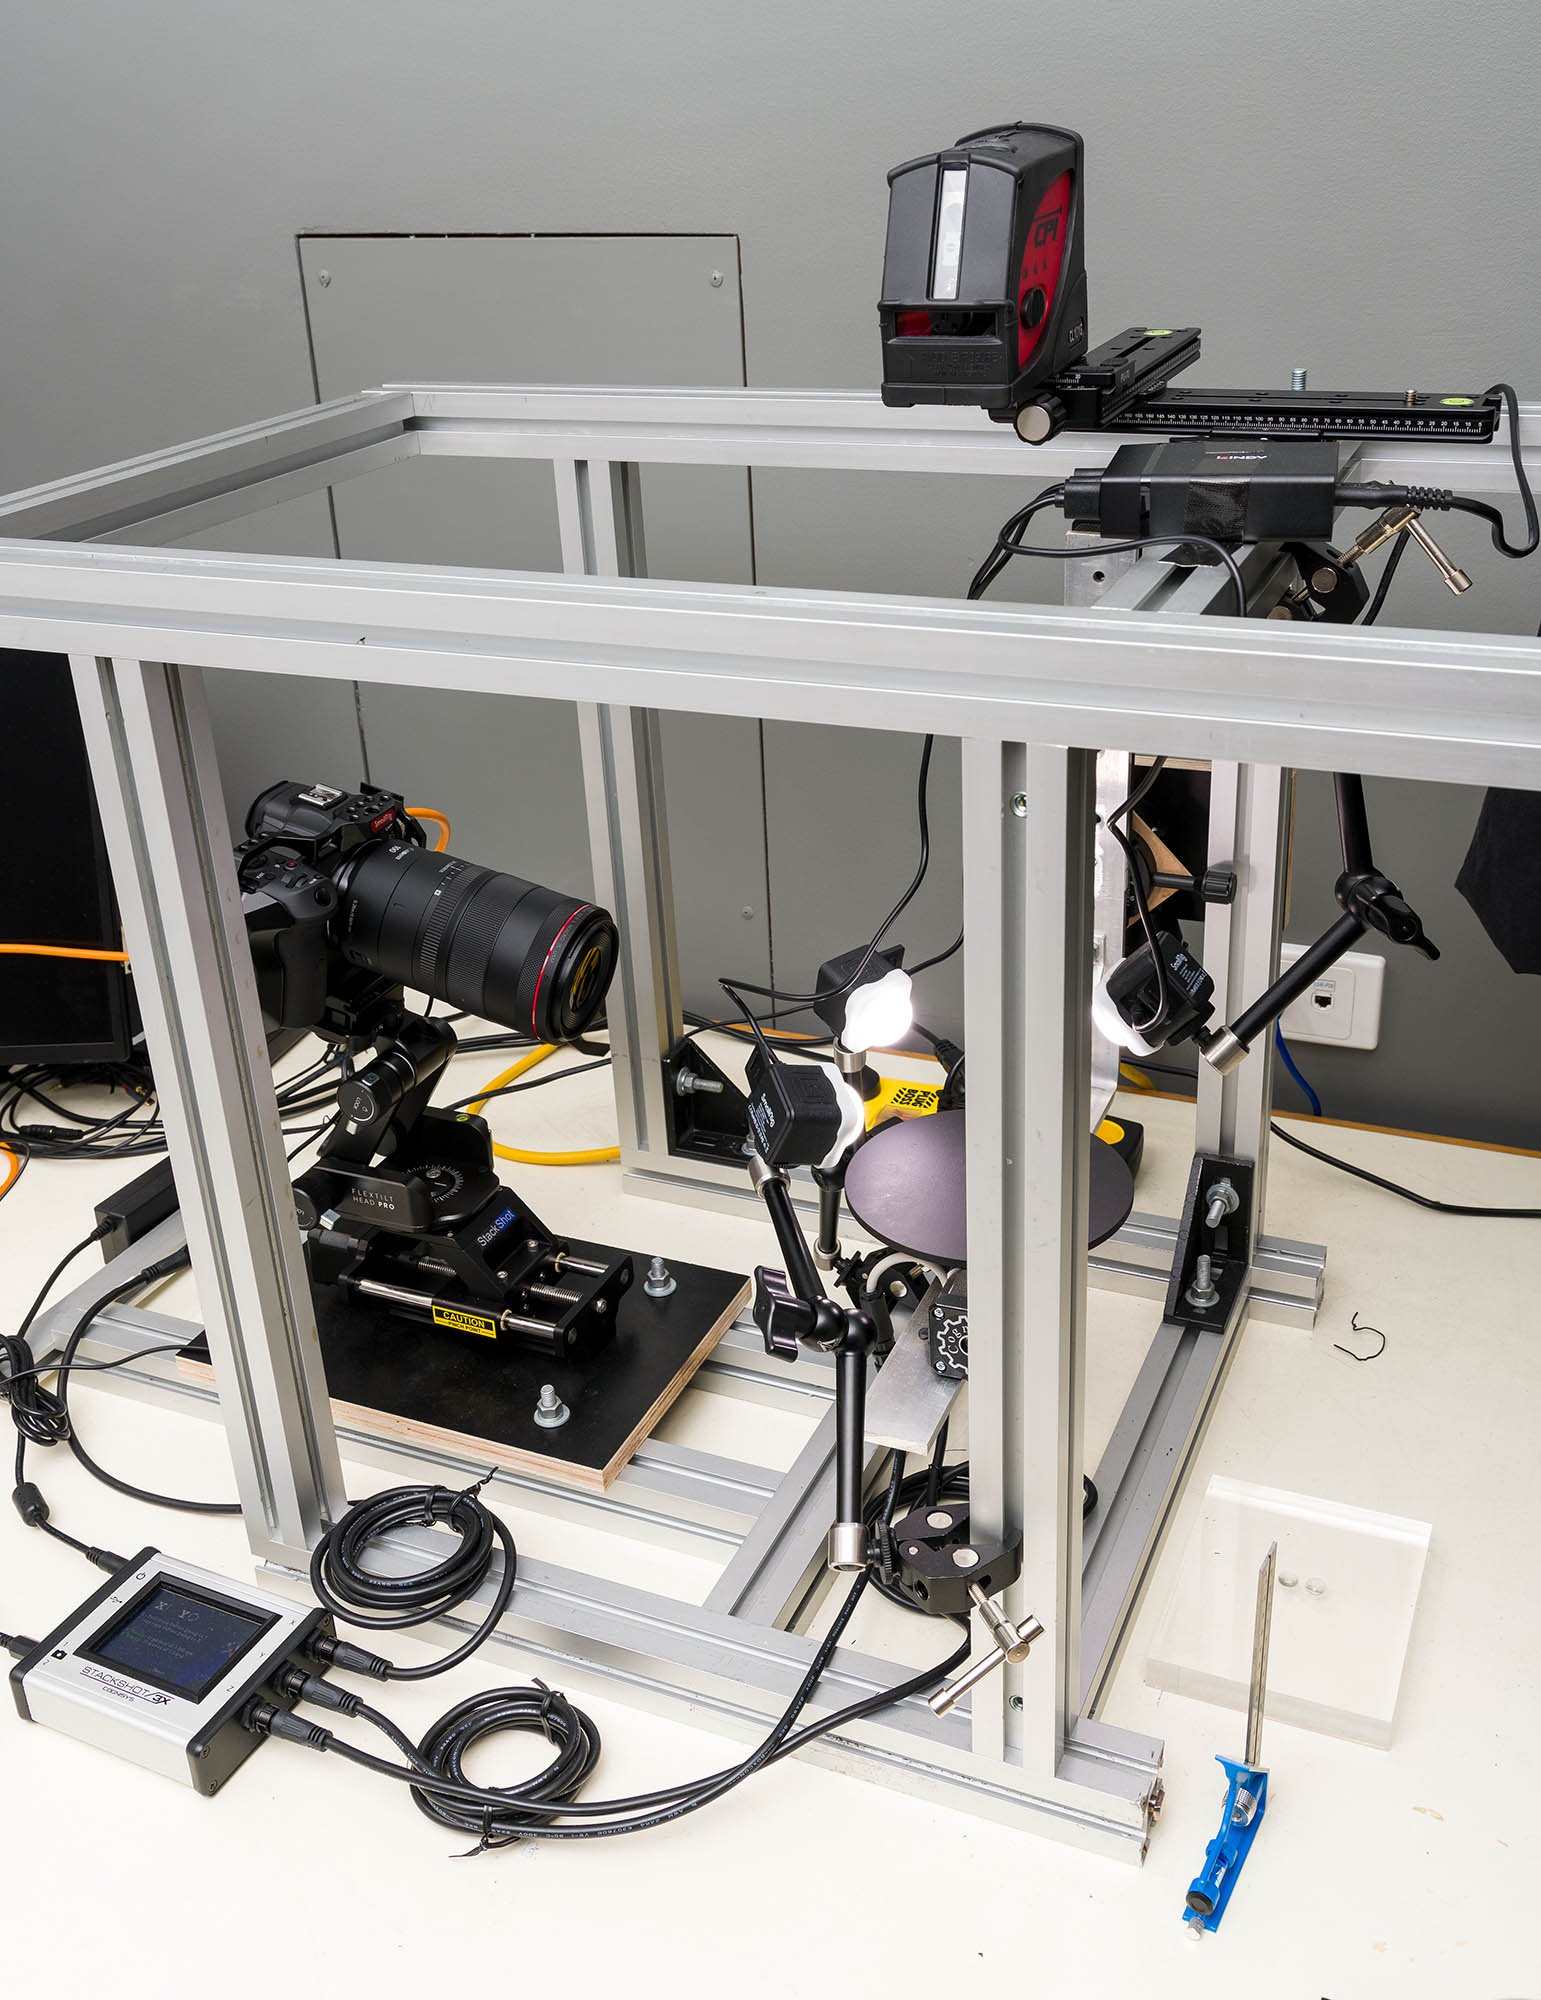
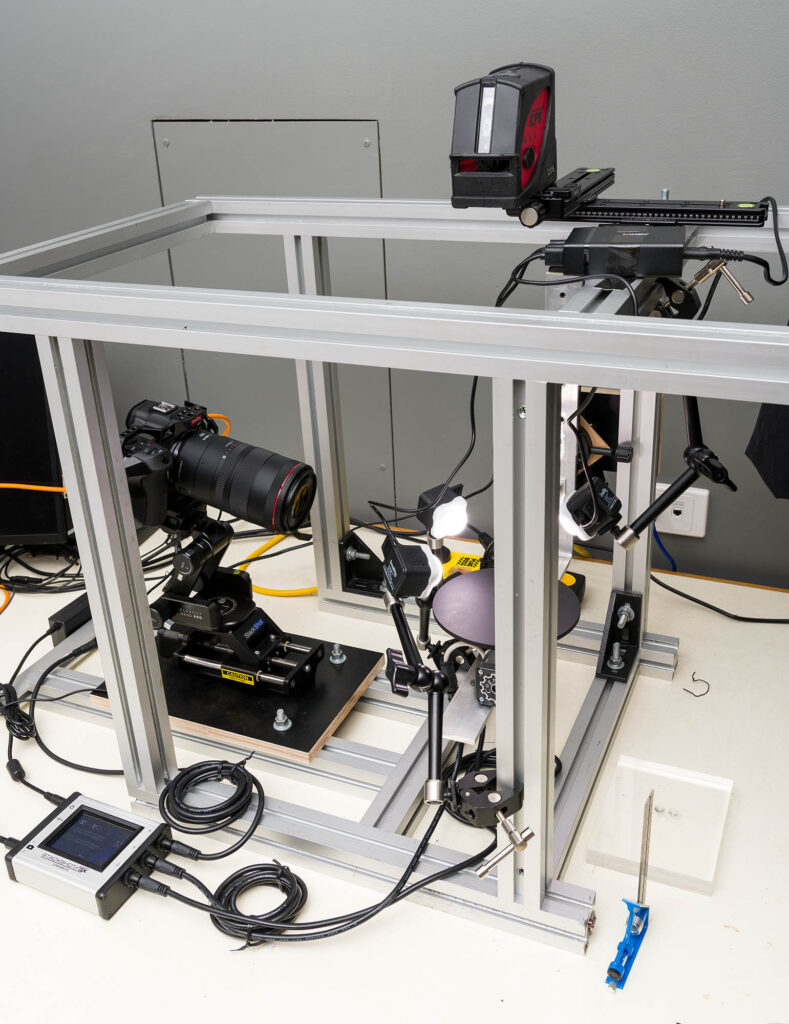
In terms of capture you’ve got two basic approaches – either move camera or the focus ring. Both of these options have manual and automatic options, but my preference is to mount the camera on a software-controlled focus-rail like that supplied by Cognisys so the stack can be running while you are grabbing a well-earned coffee.
When it comes to post-production you can achieve reasonable results using Photoshop or similar but it’s way easier to employ dedicated software like Zerene Stacker or my favourite, Helicon Focus. I’m told Zerene has better tools for image cleanup, but because I’m doing Photogrammetry it’s completely impractical for me to go in and cleanup individual images. More about that later!
Magnification 4X, focus stacked from 67 source images.
© Queensland Museum, Andy Wang & Geoff Thompson.

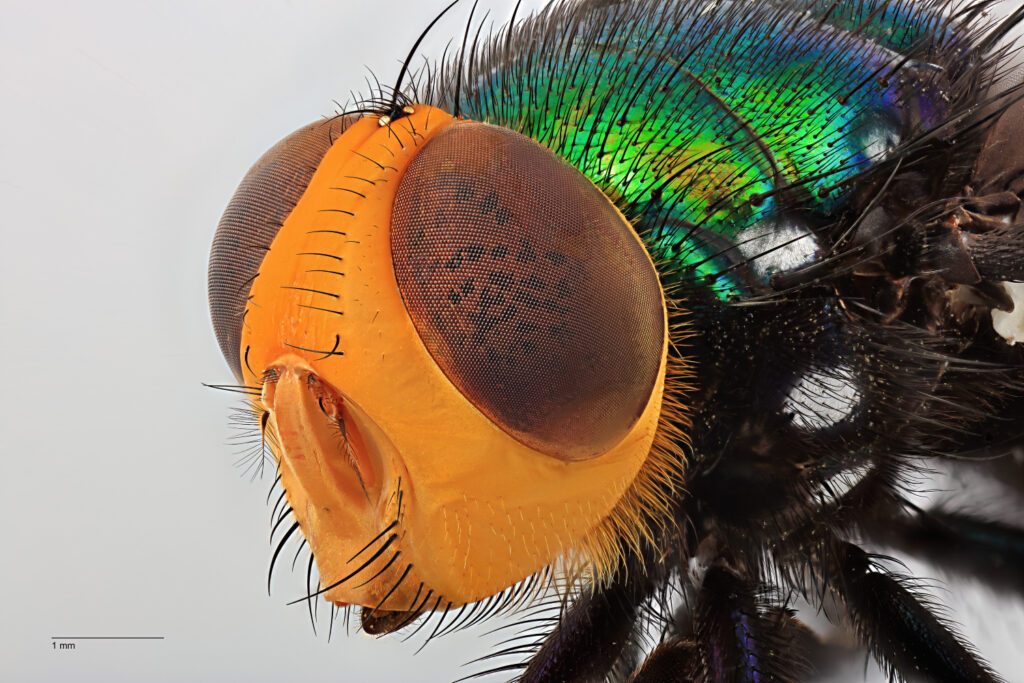
20X Mitutoyo microscope objective, focus stacked from 301 source images.
© Queensland Museum, Geoff Thompson.
Of course with photogrammetry we are not just talking about a single still image. We need lots to generate a 3D model. Let’s say we create a single composite ‘stacked’ image from (a modest) 20 separate still images. If we then want to shoot it on a turntable say, every ten degrees – that’s 20 x 36 and if we do six orientations that’s times six again = 4,320. Which is a lot of photos and that’s why I use a robot. Plus a mirrorless camera in full electronic shutter mode!
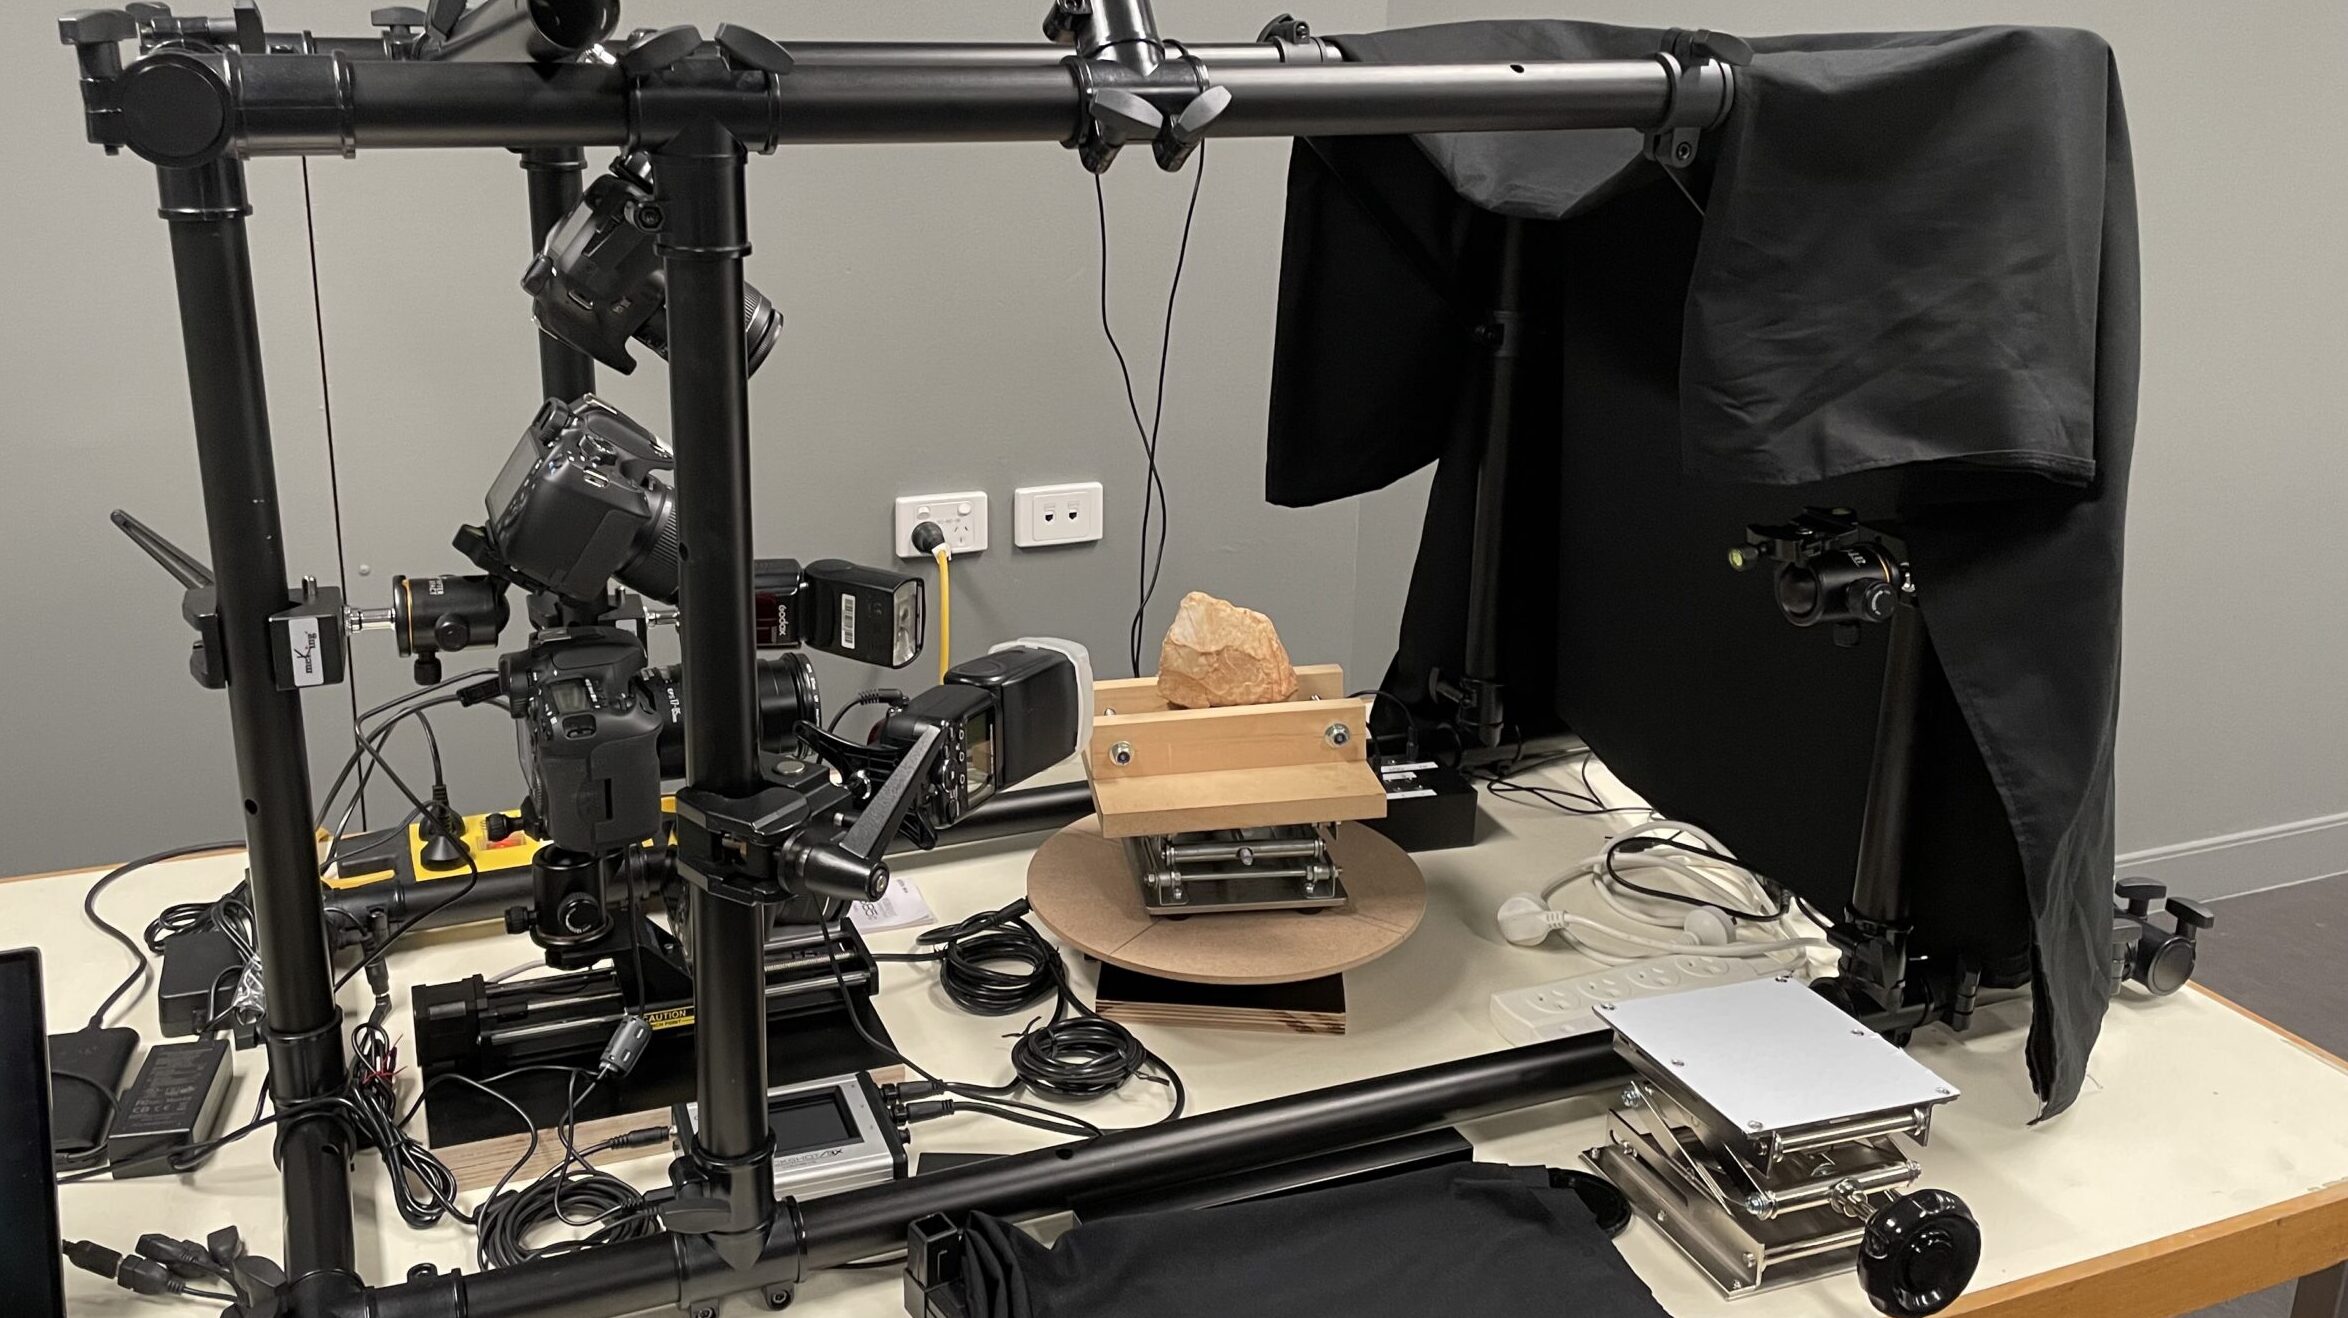
It’s a miracle it works at all to be honest, but it does… here’s a fossilized coral specimen from the QUT geoscience collection rendered into a 3D model. The model has been decimated down to 500,000 triangles and only has a single, diffuse texture plus a bit of sharpening etc in post-processing.
You can find a lot of useful information on focus-stacking and equipment at the Extreme Macro site [looks like the SSL certificate is down!] plus Allan Walls has an excellent YouTube channel with lots of video tips on this technique. But most online resources are focused on still imagery, so here’s a few thoughts I’ve put together on how to do focus-stacking for photogrammetry.
{NB: The example below uses Content-Panels as a method for adding extra content areas to this page. They can be toggled on and off using each of the ‘buttons’. An alternative option is to use additional pages for each individual sub-section and either link to them directly or add to the sidebar navigation. Which is a better option?}
Photogrammetry & Focus-Stacking – Tips
Use a Robot!
Too many photos to take manually
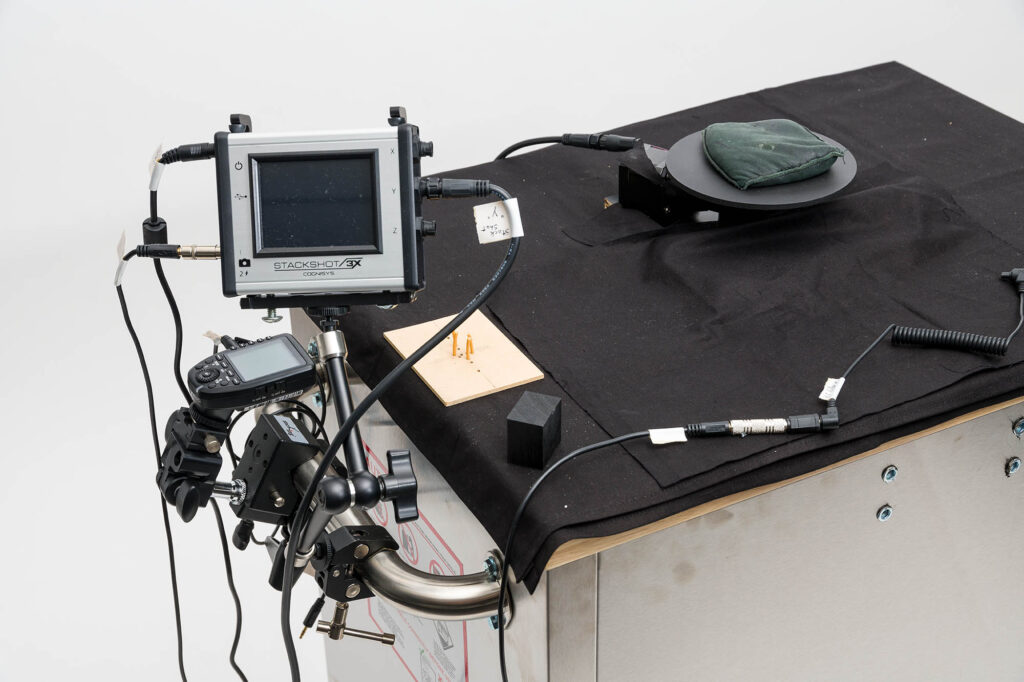
Automation is imperativePhotogrammetry done with focus-stacking looks (and is) amazing but very time-consuming. Human beings are just not good at highly repetitive tasks, so ideally you can deploy some automation with your rig. My preferred tool for doing this is the StackShot by Cognisys. Their deluxe 3X kit ships with a macro rail, two rotary tables, plus an embedded controller with accessories and while it costs two thousand dollars US, the expense is well worth it.
Most of the work I’ve done has deployed the rail for linear stacking plus a single turntable for object rotation. The controller enables us to set up the parameters and do all photography for a single ‘platter’ in one go. So, let’s say our object requires 10 images per linear stack and we decide to shoot every 5 degrees of arc, that will take around an hour to complete. Repeat that five more times with reorientation of the object in between takes and you’ll only get one item done in a standard working day. So you can see why the robot is a good idea… (learn more here…)
Laser Beam Object Positioning system
A nifty idea for getting things in-shot.
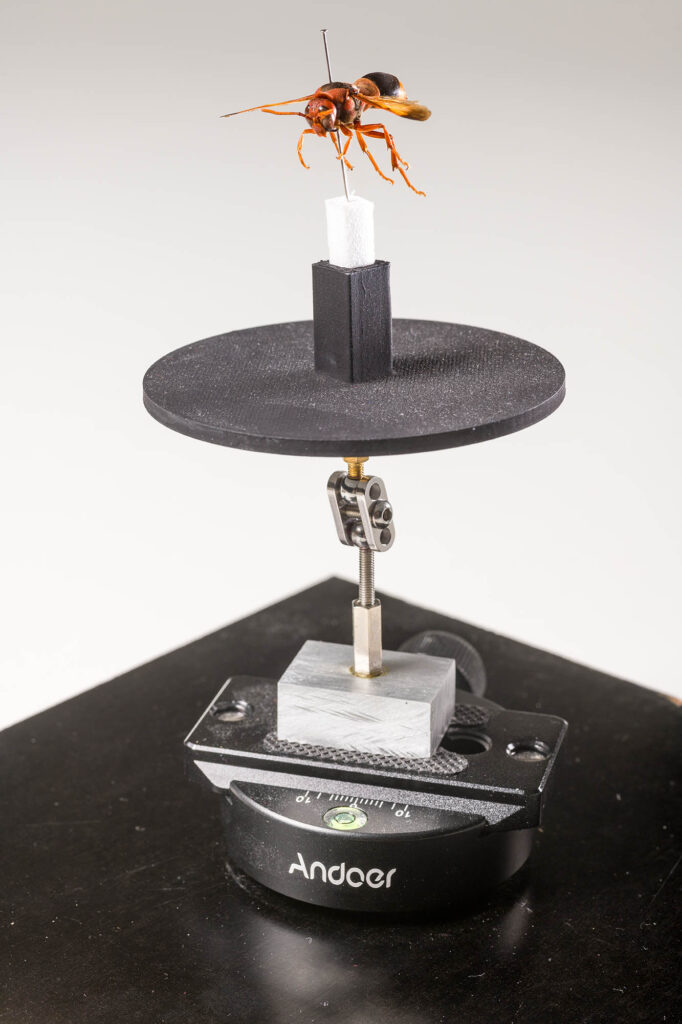
X, Y, Z – axis positioning
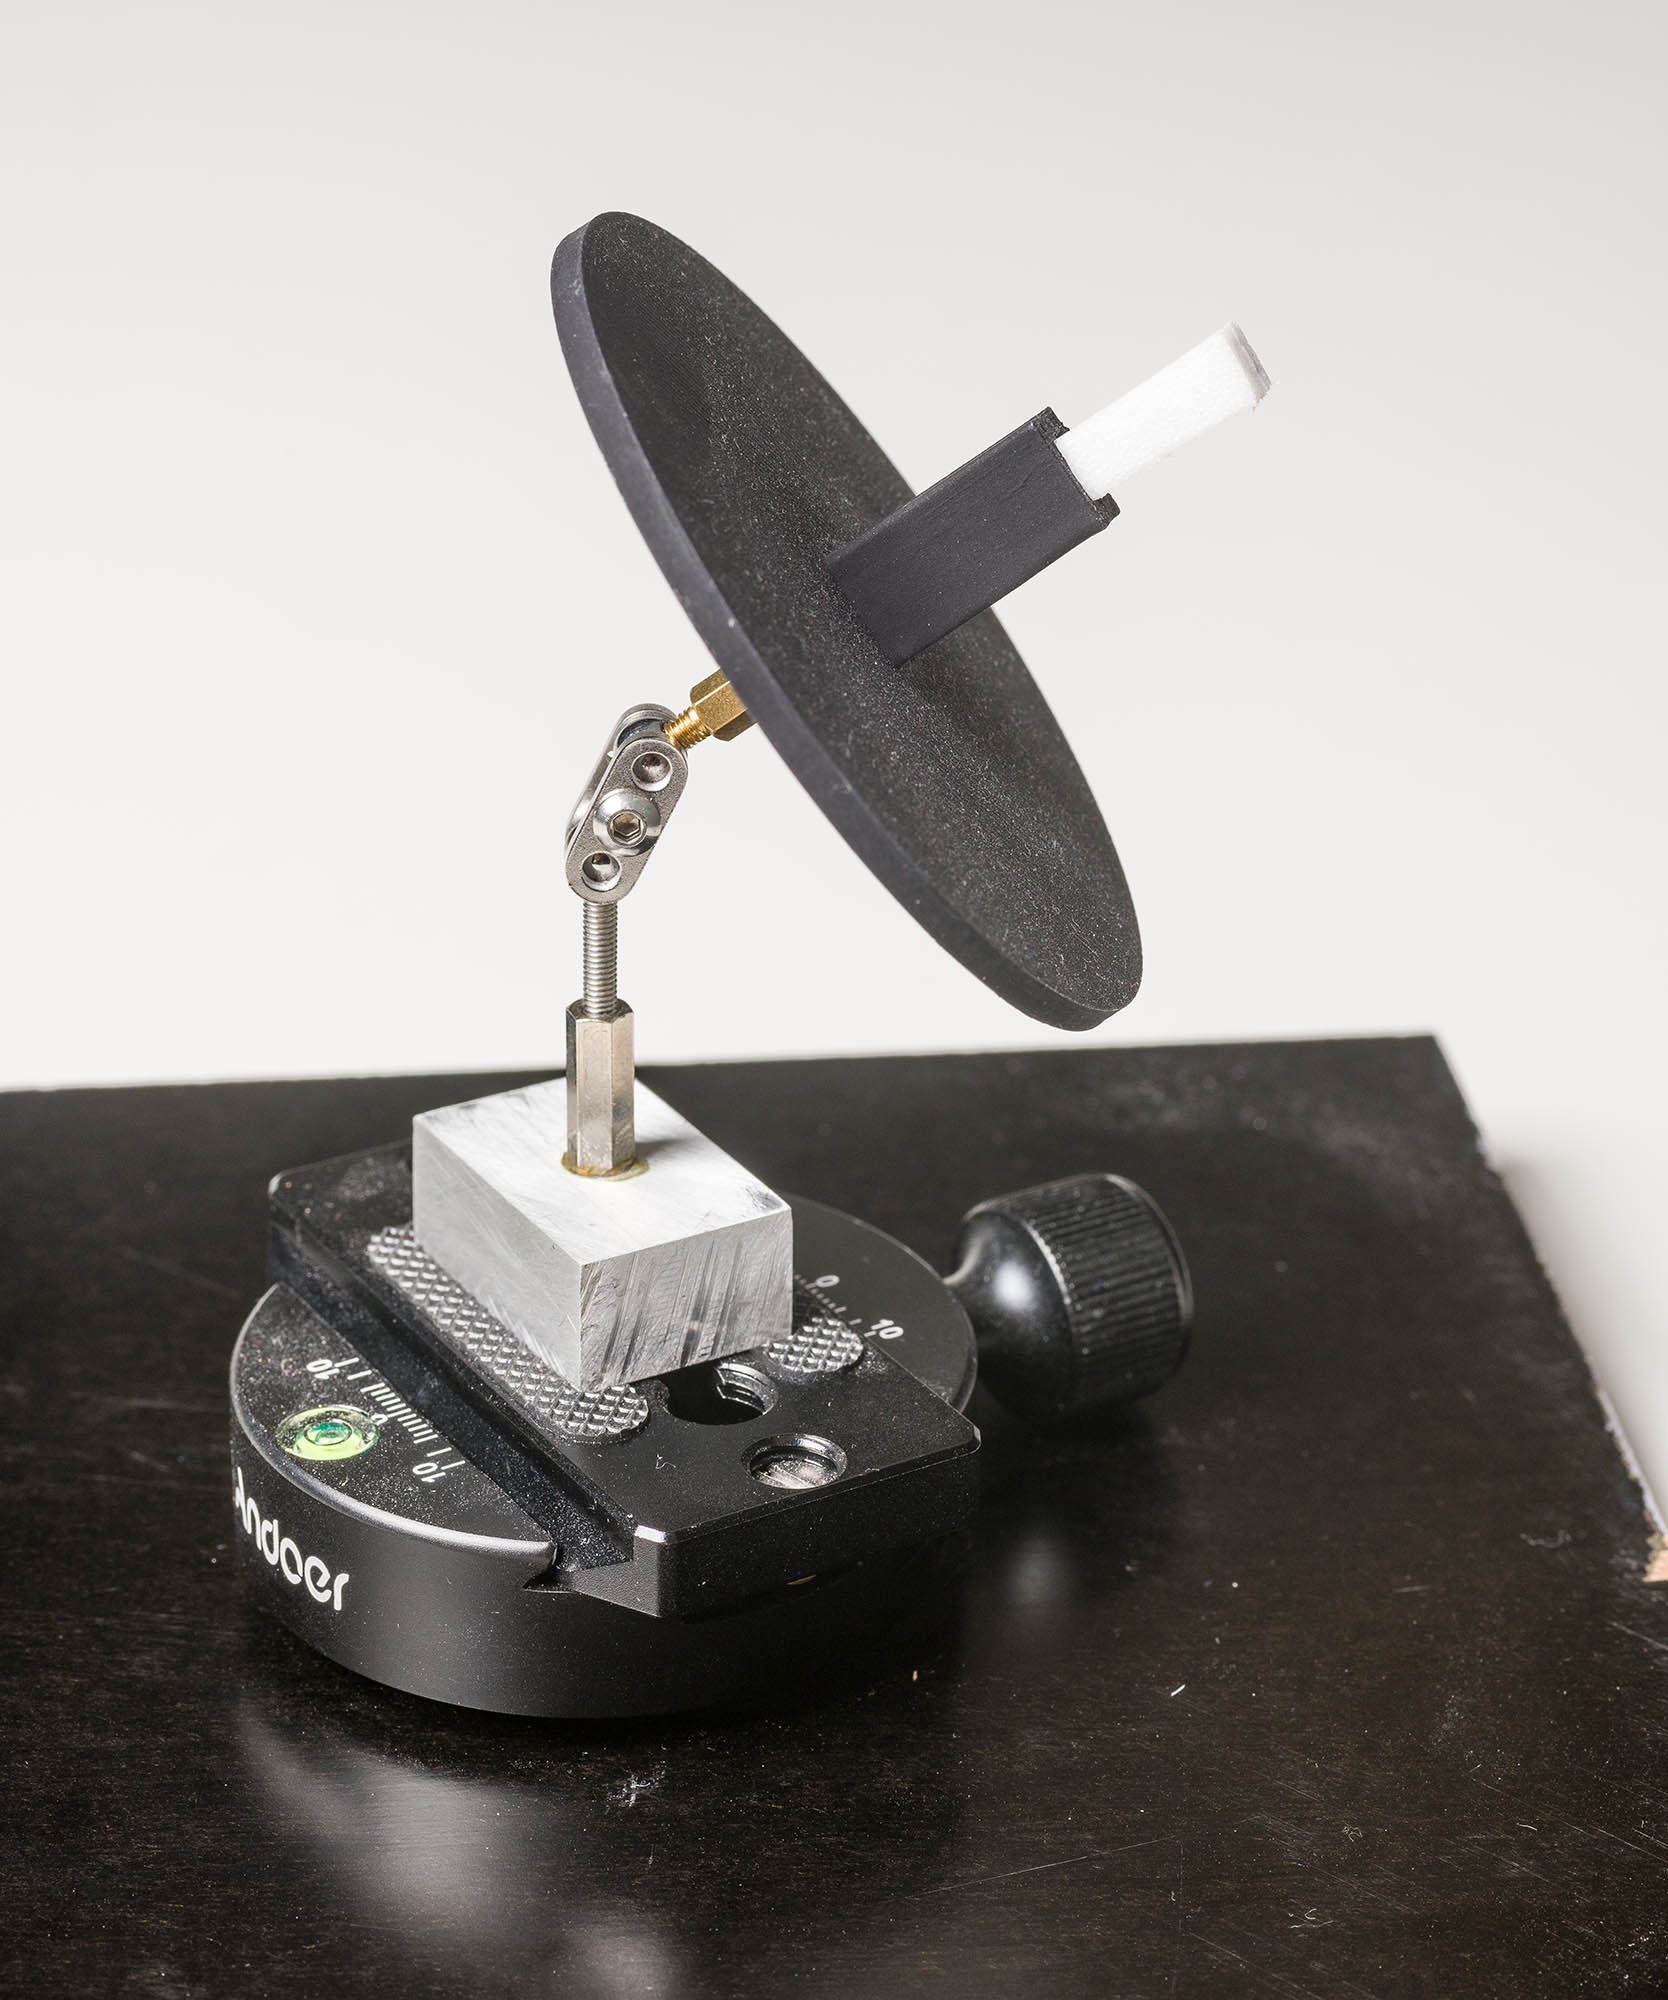
Insects are small – centre axis of rotation
Insects are great for using automation because they have a pin through the body - which opens up the option to do X, Y, Z axis photogrammetry in a single hit. That’s because you take gravity out of the equation. Assuming you are using a rail on the X axis for stacking, a turntable on the Y axis to rotate the object, then if you mount the entire turntable assembly on another turntable (Z axis) you could in theory rotate that as well thus providing you with different orientations of the object and enable you to acquire the complete set of images necessary for photogrammetry.But if the object is not mounted securely, it will just fall off as you rotate the Z axis past its co-efficient of friction. Which is where pins come in. You can secure the insect on its mount.
But many insects were mounted a long time ago and photogrammetry was not on the list of applications at that time. So the pin is not always positioned at the perceived centre of the creature. This means a mounting system that can easily accommodate small adjustments to positioning and angle is deeply useful. I’ve experimented long and hard with this and the current system uses a bespoke combination of 3D printing, stop-motion armature hardware, and COTS photographic clamp accessories. And it works! (learn more here…)